
Charcoal is the most honest drawing material there is. It goes on fast, smears easily, and covers large areas in seconds. It responds directly to pressure: a light touch makes a pale gray mark and a firm grip makes near-black. It erases partially with a kneaded eraser and completely with a chamois, which means you can draw, reconsider, redraw, and refine all on the same surface. And yet, despite this apparent forgiveness, charcoal demands more from your eye than almost any other medium, because its primary language is value: the range of tones from pure white paper to absolute black.
Artists have used charcoal for preparation and finished drawing for centuries. Michelangelo covered walls with charcoal cartoons before transferring compositions to fresco. Kathe Kollwitz used compressed charcoal to create some of the 20th century's most emotionally devastating prints and drawings. Georges Seurat developed an entire practice around the subtle range of tones achievable with powdery charcoal on textured paper, creating atmospheric images that influenced his development of Pointillism. The material has not changed since their time. What it can do is what it has always been able to do. Learning to use it well is mostly learning to see value relationships accurately.
This guide covers the three types of charcoal, how to control dark values with precision, the fundamental techniques of smudging and layering, and how to build a drawing practice that will develop your eye as much as your hand.
The Three Types of Charcoal and What Each Does
Vine charcoal, compressed charcoal, and charcoal pencils each have distinct properties that suit different purposes. Using the wrong type for the wrong task is a common source of frustration that is easy to avoid once you understand what each one is for.
Vine Charcoal
Vine charcoal is made by charring thin sticks of grapevine wood in the absence of oxygen. The result is the softest and most easily removed form of charcoal. Vine charcoal sits on the surface of the paper rather than embedding deeply in the tooth, which is why a soft brush or light finger stroke removes it almost completely. This erasability makes vine charcoal ideal for initial placement lines and compositional blocking, where you need to establish proportions and structure without committing. If you misplace an element, you brush off the vine charcoal and redraw without any ghost of the previous mark. Most art instructors recommend starting every drawing with vine charcoal for exactly this reason.
Compressed Charcoal
Compressed charcoal is made from powdered charcoal mixed with a binder and pressed into sticks. It is considerably denser and darker than vine charcoal, embeds more deeply into paper tooth, and is significantly harder to remove. A kneaded eraser will lighten it but rarely removes it completely. This quality makes compressed charcoal ideal for the darkest values in a drawing, for building up rich darks that vine charcoal cannot achieve, and for final detailed work where commitment matters. It is not appropriate for early, tentative stages of a drawing.
The practical approach used by most professional charcoal draughtsmen is to start with vine charcoal for composition and broad tones, then use compressed charcoal to develop the deepest darks and sharper edges as the drawing progresses.
Charcoal Pencils
Charcoal pencils encase compressed charcoal in a wood casing that can be sharpened to a point. They allow precise, detailed mark-making that loose sticks cannot achieve, but they sacrifice the smudgeable quality that makes charcoal distinctive. They work best for final detail additions over a looser charcoal drawing: sharpening an eye, defining the crisp edge of a fabric fold, or adding a precise linear accent over atmospheric tonal work.
Understanding Value: The Core Skill in Charcoal Drawing
Value refers to the lightness or darkness of a tone, independent of its color. In charcoal drawing, which is monochromatic, value is everything. It creates the illusion of three-dimensional form, separates foreground from background, describes the quality of light, and generates the visual hierarchy that guides a viewer's eye through the composition.
The full value scale runs from pure white paper through a range of grays to absolute black. Most effective charcoal drawings do not use the full scale evenly. Instead, they push toward a particular key: high key drawings use mostly lights and mid-lights for an airy, luminous effect, while low key drawings concentrate in the mid-tones and darks for weight and drama. Learning to see your subject in terms of this value structure, separating light areas from dark areas before considering shape or detail, is the central skill that charcoal teaches.
This discipline in reading value transfers directly to every other drawing and painting medium. Our guide to drawing fundamentals covers value as one of the core elements, and returning to those principles while working in charcoal will reinforce both skill sets.
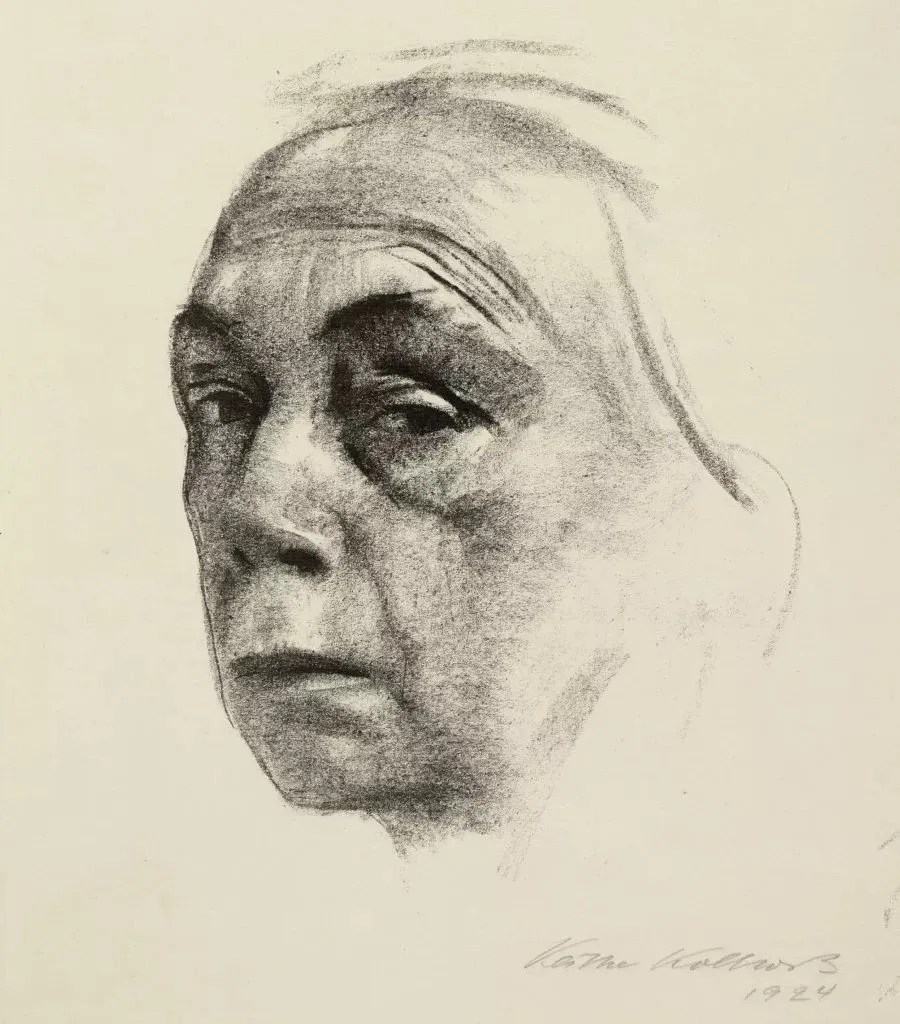
Kathe Kollwitz, "Self-Portrait" (1924), charcoal on paper. Kollwitz used compressed charcoal with exceptional control of dark values to create psychological depth and emotional weight. Her self-portraits rank among the most powerful examples of charcoal as a medium for serious artistic expression. Image: Public domain, via Wikimedia Commons
Core Techniques: Smudging, Layering, and Erasing
Smudging
Smudging is the most characteristic charcoal technique. Rubbing applied charcoal with a finger, a tortillon, or a soft cloth blends marks into smooth tonal gradients and creates the atmospheric, velvety quality that distinguishes charcoal from pencil. The key is understanding that smudging distributes existing pigment rather than adding new pigment, so you can only smudge charcoal that is already on the surface. Smudge too aggressively over a light area and you will simply spread a gray wash across your white paper. The technique works best for building soft transitions in mid-tone areas.
Layering
Unlike soft pastel, charcoal can be layered repeatedly with the same stick by applying, partially fixing, then applying again. Repeatedly applying vine charcoal over a lightly sprayed area builds up rich tonal depth that a single application cannot achieve. Moving from light to dark by gradually adding layers, then lifting selectively with a kneaded eraser to restore lights, is the structural basis of most serious charcoal work.
Erasing as Drawing
In charcoal, the eraser is not just a correction tool. It is a positive drawing instrument. A kneaded eraser pulled to a sharp edge can lift highlights from a mid-tone area with the same precision as a pencil mark. This technique, used by Seurat in his charcoal drawings, allows you to draw light shapes out of a dark field rather than building darks around light shapes. Try laying a mid-tone gray over a large area with vine charcoal, then using a kneaded eraser to pull your lightest values out of that ground. The reversal of the usual drawing logic is what makes charcoal uniquely expressive.
Hatching and Cross-Hatching
While smudging is the most immediately distinctive charcoal technique, building tone through parallel lines (hatching) or crossing sets of parallel lines (cross-hatching) gives drawings a different quality: more energetic, more visually active, and more clearly structured. Michelangelo's charcoal preparatory drawings show cross-hatching of extraordinary density to describe muscle and drapery. The technique is more demanding than smudging but creates more information-rich tonal areas.
Learning From the Masters of Charcoal
Two artists in particular show the range of what charcoal can accomplish at the highest level.
Georges Seurat (1859 to 1891) developed his unique charcoal style by drawing on cream-colored Michallet paper with irregular texture, pressing the charcoal lightly so it only caught the raised tooth and left the valleys white. The result was images made entirely of distributed tonal dots, somewhere between drawing and visual static. Seurat's charcoal drawings, including numerous studies for "A Sunday on La Grande Jatte" (1886), have an atmospheric depth and softness that prefigures his Pointillist technique. He used no line at all in most of these works; form emerged entirely from tone. The Museum of Modern Art's Seurat holdings include several of these drawings and are worth studying closely.
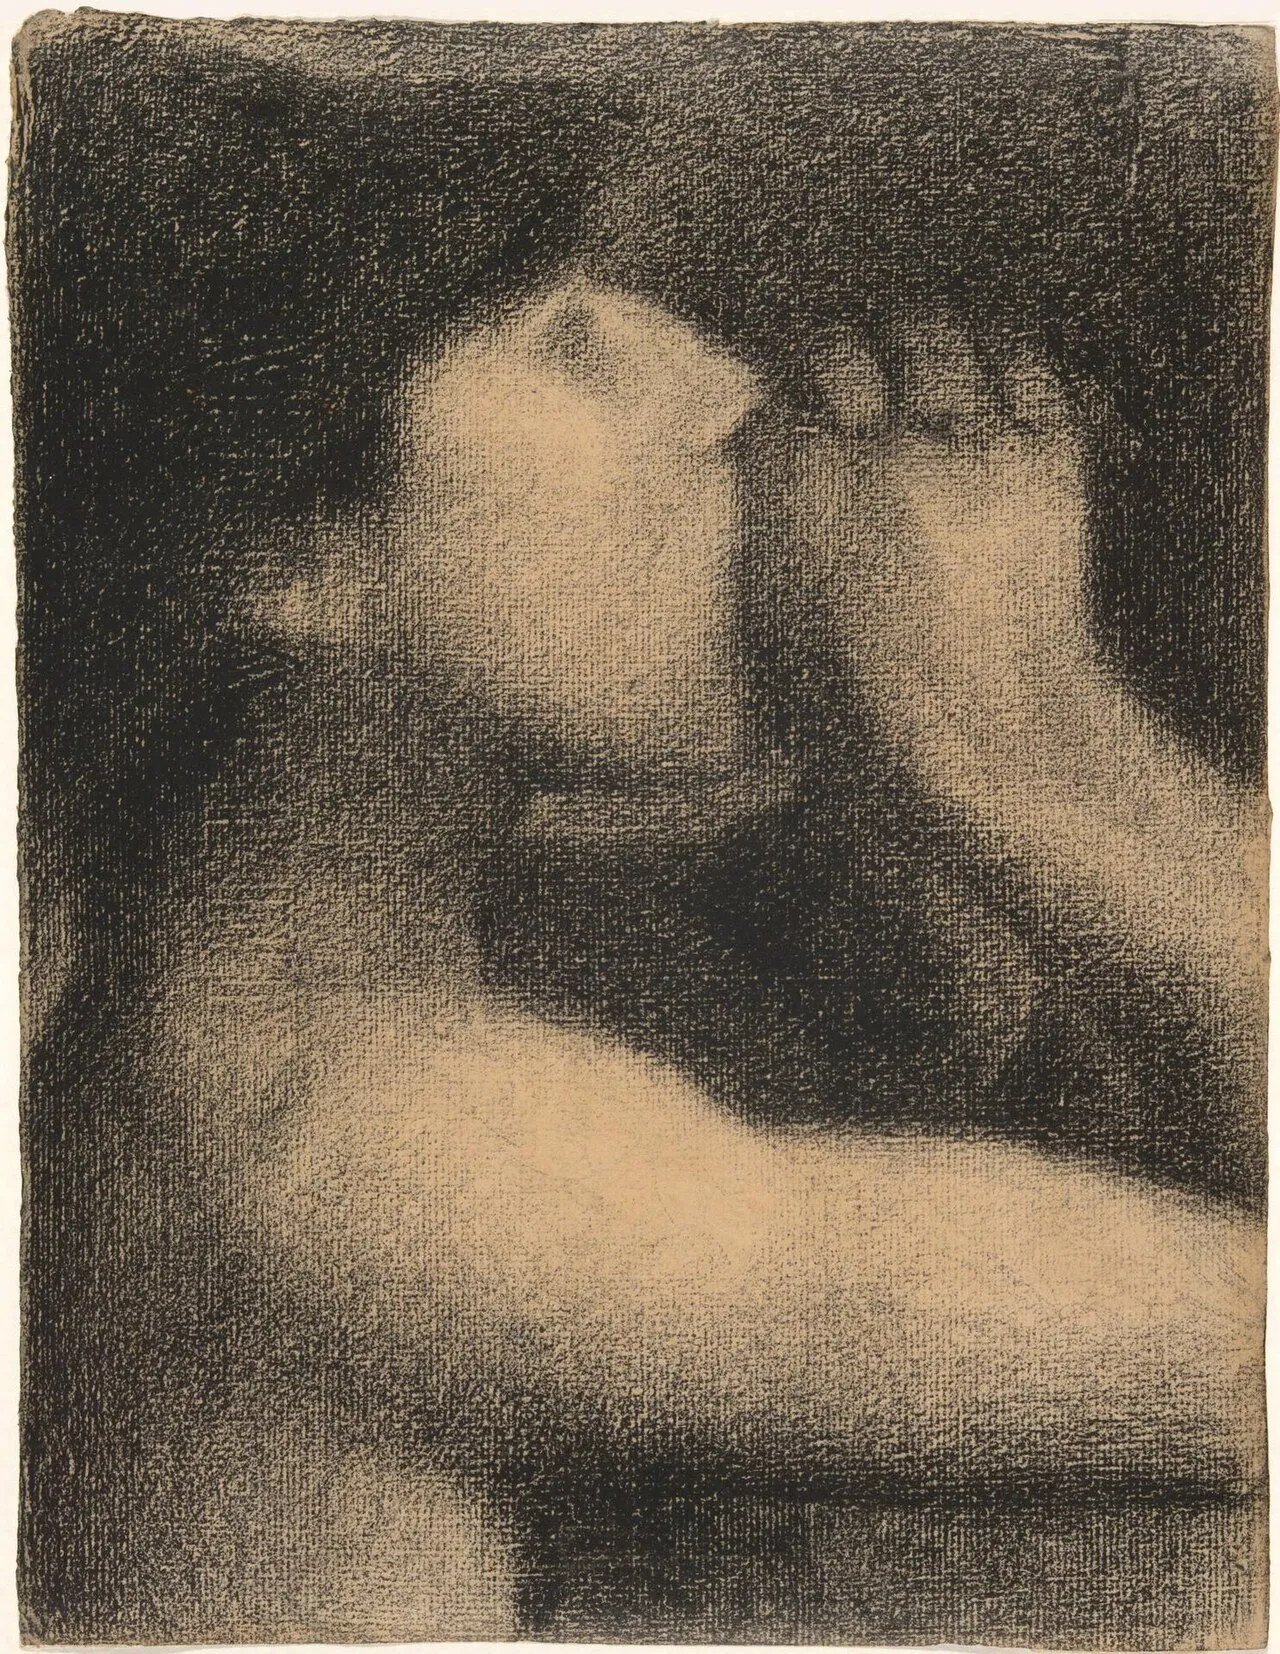
Georges Seurat, conte crayon drawing. Seurat's approach to charcoal-like media: building form entirely through distributed tone without a single outline. The soft marks on textured paper create luminous effects that parallel his pointillist technique in painting. Image: Public domain, via Wikimedia Commons
Kathe Kollwitz (1867 to 1945) used charcoal and related media for an entirely different emotional register. Her drawings of working-class poverty, grief, and political solidarity use deep, compressed darks and strong value contrast to create images of extraordinary psychological weight. In "Self-Portrait" (1924), the tonal modeling of her face is spare and unsparing, using the medium's capacity for rich darks to render age, experience, and dignity. Kollwitz is proof that charcoal's value range is capable of deep emotional communication, not just formal description.
Setting Up Your Charcoal Practice
You need very little to start. Sticks of vine charcoal, one or two compressed charcoal sticks, a kneaded eraser, a chamois or soft cloth, and a pad of charcoal paper or newsprint are all that is strictly necessary. Newsprint is cheap enough to work through quantities of paper without anxiety, which is essential at the beginning. Canson Ingres or Mi-Teintes paper in a neutral gray or warm cream provides a mid-tone ground that makes value relationships easier to judge than pure white paper.
Work standing at an easel or a vertical surface when possible. Drawing vertically eliminates the foreshortening distortion that results from looking down at horizontal paper, and it lets you step back to assess the whole drawing. Arm-length marks made standing are looser and more expressive than the cramped marks made at a desk.
Spray finished drawings with workable fixative in several light coats, building up protection gradually. A single heavy coat can cause drips and alter the surface. Let each coat dry before applying the next.
Final Thoughts
Charcoal's directness, speed, and tonal range make it one of the most valuable media for developing your eye as an artist. It forces you to think about value before detail, to commit to major decisions while leaving smaller ones open, and to use erasure as creatively as application. These habits of mind transfer directly to painting in oil, acrylic, or any other medium.
Whether you work in the atmospheric, tone-only manner of Seurat or the compressed, emotionally direct mode of Kollwitz, charcoal rewards practice with rapid improvement. Next, consider how the value skills you develop here apply to composition and focal points in finished work. For figure drawing with charcoal specifically, our guide to figure drawing fundamentals covers how to apply tonal charcoal work to the human form.


