
Every artist who ever lived started by drawing. Before Michelangelo painted the Sistine Chapel ceiling, he spent years filling sketchbooks with anatomical studies, drapery studies, and compositional sketches. Before Picasso fractured reality into Cubist planes, he could render a human face with photographic precision. Drawing is the foundation of every visual art form — the skill that trains your eye to see, your hand to record, and your mind to translate three-dimensional reality onto a two-dimensional surface. It is also the most accessible art form: all you need is a pencil and a piece of paper.
Drawing is not a talent you are born with. It is a set of learnable skills — observation, hand-eye coordination, understanding of light, knowledge of proportion and perspective — that improve with practice. The persistent myth that some people "can draw" and others "can't" is exactly that: a myth. What separates skilled draughtspeople from beginners is not innate ability but hours of practice and a few fundamental techniques that anyone can learn.
This article covers the essential building blocks of drawing: line, value, form, and perspective. Whether you want to start drawing yourself or simply understand what you are seeing when you look at drawings in a museum, these fundamentals will sharpen your eye and deepen your appreciation.
Line: The Most Basic Element
Every drawing begins with a line. A line is a mark that moves through space, and it is the most fundamental element of visual art. But lines are not all the same — their weight, quality, and character communicate different things.
Types of Line
Contour lines — Lines that define the outer edges (and sometimes inner edges) of a form. A simple contour drawing captures the essential shape of a subject with economy and clarity.
Gesture lines — Quick, energetic lines that capture the movement, rhythm, and energy of a subject rather than its precise outline. Gesture drawing is a fundamental warm-up exercise for artists, especially figure drawers.
Construction lines — Light, temporary lines used to establish proportions, angles, and spatial relationships before adding detail. Think of them as scaffolding that gets removed once the structure is built.
Expressive lines — Lines that carry emotional weight through their character. A trembling line feels anxious. A bold, sweeping line feels confident. A delicate line feels tender. Artists like Egon Schiele and Henri Matisse used line expressively — Schiele's angular, nervous contours convey psychological tension, while Matisse's flowing curves radiate calm and sensuality.
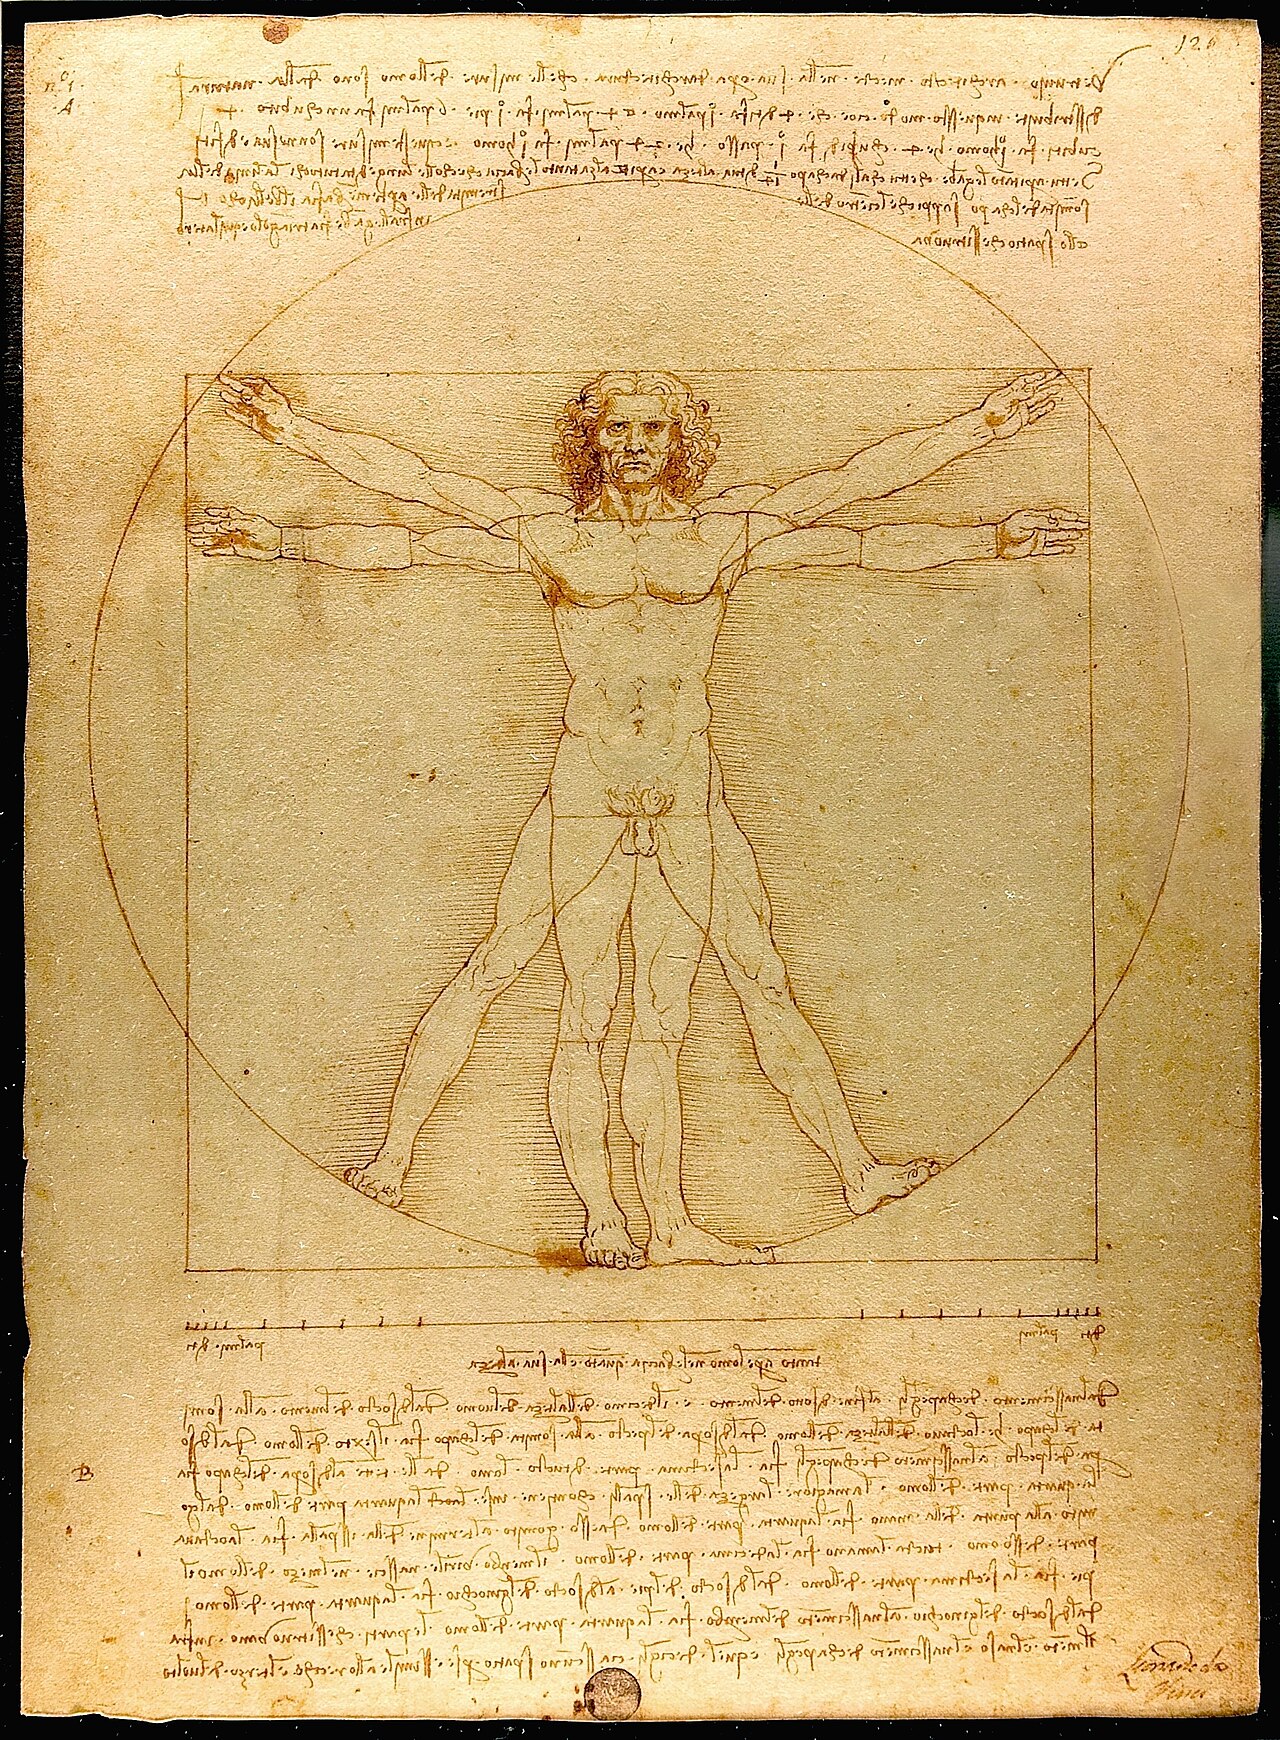
Leonardo da Vinci, "Vitruvian Man" (c. 1490), pen and ink on paper, 34.6 × 25.5 cm. Gallerie dell'Accademia, Venice. Leonardo's drawing demonstrates mastery of line, proportion, and anatomical understanding. Image: Public domain, via Wikimedia Commons
Line Weight
Varying the thickness and darkness of your lines creates depth and visual interest. Thick, dark lines appear to advance (come forward), while thin, light lines recede. Using heavier lines for the edges closest to the viewer and lighter lines for distant or less important edges creates a sense of three-dimensionality even without shading.
Value: Light and Shadow
Value refers to the lightness or darkness of a tone. In drawing, value is how you create the illusion of three-dimensional form on a flat surface. When light hits a solid object, it creates a predictable pattern of light and shadow that artists learn to observe and reproduce.
The Value Scale
A value scale ranges from pure white to pure black, with gradations of gray in between. Most drawings use five to nine distinct values. Training yourself to see these value differences in the real world — not just the colors but the lightness and darkness of surfaces — is one of the most important skills in learning to draw realistically.
Shading Techniques
Hatching — Parallel lines drawn close together. Closer lines create darker values; farther apart lines create lighter values. The direction of the hatching can follow the form of the object, enhancing the sense of three-dimensionality.
Cross-hatching — Layers of hatching in different directions, building up darker values through intersection. Albrecht Dürer's engravings are masterclasses in cross-hatching — he created an astonishing range of values and textures using only intersecting lines.
Blending — Smoothing pencil marks with a blending stump, tissue, or finger to create seamless gradations. This produces a photographic, polished look but can also flatten the drawing if overused.
Stippling — Building up value through dots. Denser dots create darker areas, sparser dots create lighter areas. Stippling is time-consuming but produces a distinctive, luminous texture.
Light on Form
When light hits a three-dimensional object, it creates a consistent pattern:
Highlight — The brightest point where light hits most directly.
Light area — The broad area facing the light source.
Core shadow — The darkest area on the object, where the surface turns away from the light.
Reflected light — A subtle lightening within the shadow, caused by light bouncing off nearby surfaces.
Cast shadow — The shadow the object projects onto adjacent surfaces.
Learning to see and render this pattern is the key to making drawn objects look convincingly three-dimensional. Every sphere, cylinder, cube, and cone you can draw with proper light and shadow brings you closer to drawing anything in the world, because every complex form can be broken down into these basic geometric shapes.
Form: From 2D to 3D
Shape is flat (a circle, a square, a triangle). Form is three-dimensional (a sphere, a cube, a cone). The goal of most drawing is to create the illusion of form on a flat surface — to make a circle look like a sphere, a rectangle look like a box.
Breaking Down Complex Forms
Every complex object can be simplified into basic geometric forms. A human head is roughly an egg shape. A torso is a modified cylinder. A tree trunk is a tapered cylinder. An arm is a series of cylinders connected at joints. By first drawing the simplified geometric forms and then adding anatomical detail, artists build convincing representations of complex subjects.
This approach — simplify first, add complexity later — is fundamental to drawing instruction and is the method taught in most art schools. It is also the approach that Renaissance artists used when studying anatomy and proportion.

Leonardo da Vinci, anatomical studies of the shoulder (c. 1510), pen and ink on paper. Royal Collection, Windsor Castle. Leonardo combined scientific observation with artistic skill to create anatomical drawings of unprecedented accuracy. Image: Public domain, via Wikimedia Commons
Perspective: Creating Depth
Perspective is the system for representing three-dimensional space on a flat surface. It was formalized during the Renaissance by Filippo Brunelleschi and Leon Battista Alberti, and it remains essential for any artist working representationally.
One-Point Perspective
In one-point perspective, all parallel lines that recede into the distance converge on a single vanishing point on the horizon line. Think of standing on a straight road and watching it narrow to a point in the distance. One-point perspective is used for head-on views — looking down a hallway, a street, or a railway track.
Two-Point Perspective
Two-point perspective uses two vanishing points on the horizon line, creating a more dynamic view of objects seen at an angle. This is the perspective system used for most architectural drawings and urban scenes — when you look at a building's corner, the two visible walls recede toward separate vanishing points on either side.
Atmospheric Perspective
Atmospheric (or aerial) perspective creates depth through value and color changes rather than geometric construction. Objects in the distance appear lighter, bluer, and less detailed than objects in the foreground because intervening atmosphere scatters light. Leonardo da Vinci was the first artist to describe this phenomenon systematically, and it is visible in the hazy blue mountains behind the Mona Lisa.
Practical Exercises for Beginners
If you want to develop your drawing skills, here are proven exercises:
Contour drawing — Draw the outline of an object without looking at your paper. This trains hand-eye coordination and teaches you to observe carefully.
Gesture drawing — Set a timer for 30 seconds and capture the essence of a pose or object in quick, flowing lines. Speed forces you to prioritize the most important information.
Value studies — Draw a simple object (an egg, a cup, a ball) using only five values: white, light gray, medium gray, dark gray, and black. This trains your eye to see value relationships.
Copy master drawings — Studying and copying drawings by great artists (Michelangelo, Dürer, Ingres, Degas) teaches technique more effectively than any textbook. Pay attention to how they use line weight, hatching, and composition.
Daily sketching — Draw something every day, even if only for ten minutes. Consistency builds skill faster than occasional marathon sessions. An art journal or sketchbook makes this practice easy to maintain.
Drawing as Seeing
The most important thing drawing teaches is not how to make marks on paper — it is how to see. Drawing forces you to slow down and observe the world with precision and attention. You notice the exact angle of a shadow, the specific curve of a leaf, the way light wraps around a cheekbone. This heightened observation enriches not just your art but your entire experience of the visual world.
"Drawing is not what one sees, but what one can make others see," Edgar Degas said. And the foundation of making others see is learning to see clearly yourself. Every technique in this article — line, value, form, perspective — is ultimately a tool for translating observation into visual communication.
Final Thoughts
Drawing is the most fundamental and most democratic of art forms. It requires no expensive equipment, no studio space, and no formal training to begin. A pencil and a piece of paper are enough. The skills it develops — observation, hand-eye coordination, spatial reasoning, patience — benefit not just aspiring artists but anyone who wants to see the world more clearly and communicate more effectively through visual means.
Start today. Draw your coffee cup. Sketch the view from your window. Copy a drawing you admire. The first hundred drawings will be rough — every artist's first hundred drawings are rough. But each one teaches your eye and hand something new, and the cumulative effect is transformative.
Want to explore more about art fundamentals? Learn about composition in art, or discover the essential visual elements that underpin all great art.


