
Every serious art school in the world, from the Ecole des Beaux-Arts in Paris to the School of Visual Arts in New York, still teaches figure drawing from a live model. This has not changed in four hundred years. The reasons are not nostalgic. Drawing the human figure is the most complete drawing education available because a person standing, sitting, or moving contains every challenge a draughtsman can face: complex curves and straight structural lines in the same form, subtle tonal transitions across rounded surfaces, precise proportion relationships that the eye immediately detects if wrong, and a constant relationship to gravity that gives every pose its specific weight and balance.
The figure also has a unique psychological dimension. We read human bodies with extraordinary sensitivity because we inhabit one ourselves. A figure drawing in which the weight distribution is wrong feels wrong in the body, not just the eye. A portrait where the eyes are slightly too close together creates a vague unease even in viewers who cannot articulate why. This built-in discriminating intelligence makes the human figure the strictest test of drawing skill, which is exactly why learning to draw the figure teaches skills that transfer to every other subject.
This guide covers the fundamental sequence for figure drawing: gesture first, structure second, proportion throughout, and anatomy as needed. It includes the approaches of the great figure draughtsmen, practical advice for independent practice, and the best contemporary resources for developing your skills.
Gesture Drawing: Starting With Movement
The most common mistake in figure drawing is starting with the outline. The outline of a figure is a record of where the figure ends, not of what it is doing. Beginning with an outline encourages a flat, stiff drawing that describes shape without capturing the quality of a specific person in a specific pose at a specific moment.
Gesture drawing starts instead with the central line of action: the primary direction of movement or energy through the figure. Is the figure leaning forward? Twisting to one side? Bearing weight on the left hip? This dominant movement, described in one or two quick lines, establishes the life of the pose before any detail is added. Everything that follows serves this initial gesture.
Timed gesture drawing, working for sixty seconds to five minutes per pose, is the foundational practice of figure drawing education. The time limit forces commitment and prevents overworking. Working quickly, you cannot agonize over detail; you must capture the essential movement and proportion and move on. Over weeks and months of regular timed practice, your ability to see and record the gesture of a pose becomes instinctive.
Online platforms like Line of Action (line-of-action.com) and SculptGL provide pose reference for practice without access to a live model, with configurable time limits that support systematic timed drawing. These are valuable tools, but they supplement rather than replace life drawing from an actual person, whose presence in space creates drawing problems that photographs cannot fully replicate.
Proportion: The Classical Framework
Proportion in figure drawing refers to the size relationships between body parts. The most widely taught classical proportion system divides the adult figure into eight head-lengths from crown to heel. In this system: the figure is 8 heads tall; the chin falls at one head; the nipple line at two heads; the navel at three; the crotch at four (the midpoint of the figure); the bottom of the knee at six heads; the bottom of the ankle at seven and a half; and the bottom of the heel at eight.
This is an idealized system, not a precise anatomical description of any actual person. Most real adults are closer to seven or seven and a half heads tall, and athletic figures in classical art are often stretched to eight or even eight and a half heads for a heroic effect. Michelangelo's figures frequently exceed eight heads, giving them a monumental, supernatural scale. Fashion illustration uses nine or ten heads to make figures appear elongated and elegant.
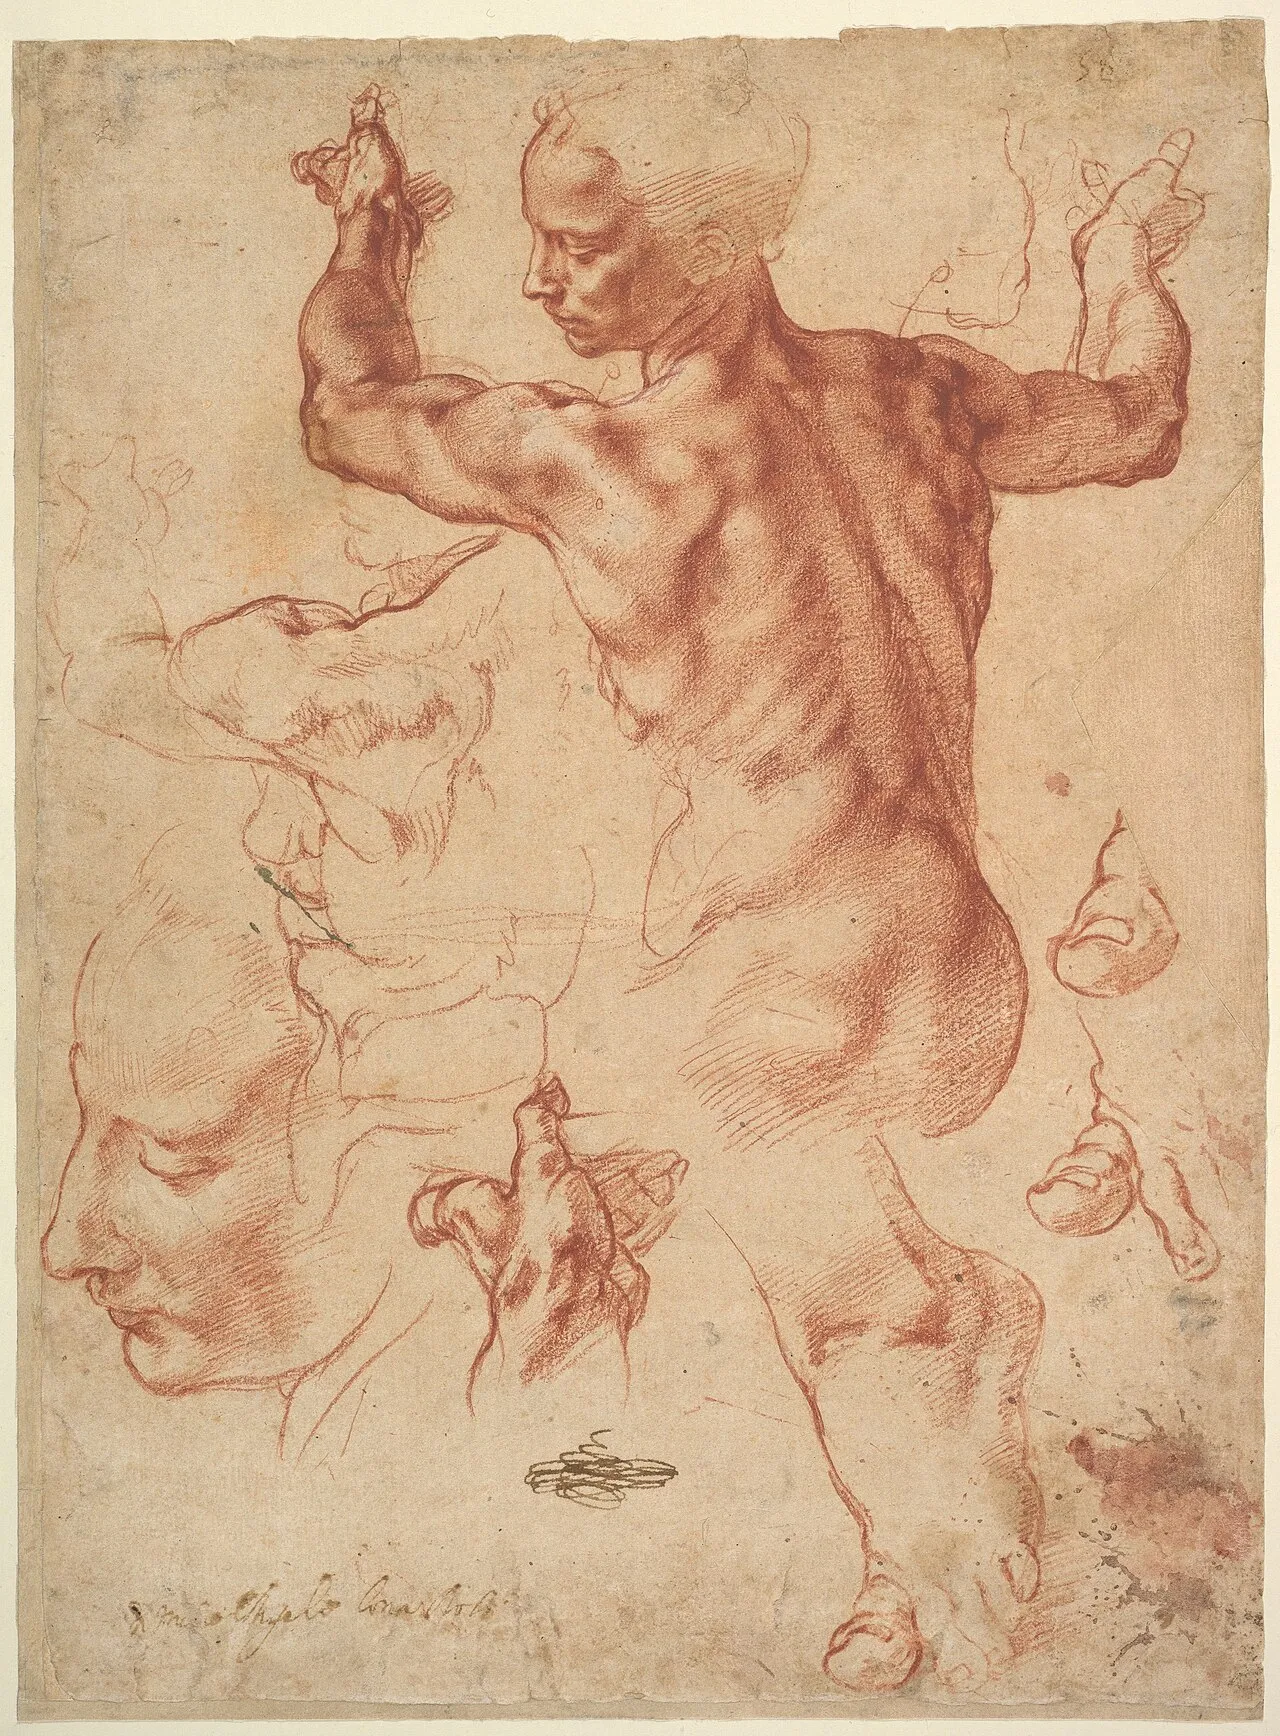
Michelangelo, "Studies for the Libyan Sibyl" (c. 1510-1511), red chalk on paper, 28.9 x 21.4 cm. The Metropolitan Museum of Art, New York. Michelangelo studied the male model extensively for figures that would be rendered in the Sistine Chapel fresco. The drawing shows how he analyzed the underlying anatomy and structure of the twisted torso before committing to the final image. Image: Public domain, via Wikimedia Commons
Rather than memorizing the eight-head system as a formula, use it as a checking tool. After making a gesture drawing, place head-length measurements against the figure to verify that major landmarks fall in the right relative positions. If the figure is 6.5 heads in your drawing but looks right, trust your eye. If it looks wrong, the proportion system will tell you where the error is.
Anatomy for Artists: What You Actually Need to Know
Full anatomical knowledge is not required to draw figures well. What matters is understanding the structures beneath the surface that determine the shapes you see, and the key landmarks that anchor the figure's structure.
The skeleton provides the hard, unchanging framework. For artists, the most useful skeletal knowledge involves: the rib cage (a large, egg-shaped volume); the pelvis (a bowl-like mass that tilts and rotates with the figure's movement); the shoulder girdle (two triangular scapulae and the clavicles that connect them to the sternum); and the major joints (shoulder, elbow, wrist, hip, knee, ankle) that mark specific points on the figure's surface.
The muscles that matter most for surface appearance are the largest ones: the deltoid (giving the shoulder its rounded mass), the pectorals (the chest plane), the trapezius and latissimus dorsi (defining the back), the biceps and triceps (the arm's volume), and the quadriceps and hamstrings (the thigh's muscle groups). Understanding even roughly how these muscles attach and how they bulge or flatten under tension and relaxation will transform your ability to render the figure convincingly.
George Bridgman's "Complete Guide to Drawing from Life" (1952) and Andrew Loomis's "Figure Drawing for All It's Worth" (1943) remain the two most effective self-study anatomy references for artists. Both are available as free PDFs through the Internet Archive. For contemporary instruction, Proko's YouTube channel provides exceptionally clear explanations of surface anatomy applied directly to drawing practice.
Learning From the Great Figure Draughtsmen
Studying historical figure drawing provides models for both technical approach and expressive ambition.
Michelangelo's "Studies for the Libyan Sibyl" (c. 1510), mentioned above, shows his method of working from a male model for a female ceiling figure: he analyzed the underlying structure of the back and arm through multiple overlapping studies before determining the final pose. The drawing is full of corrections and reconsiderations, which is instructive in itself: even the greatest figure draughtsman in history worked through the problem rather than arriving at it directly.
Raphael's figure drawings show a different approach: fluid, graceful contour lines that describe the surface of the figure with minimal shading, yet produce an impression of complete three-dimensional form through the quality of the line alone. Raphael's drawings demonstrate that economy of means and quality of observation can outperform technical complexity.
Egon Schiele (1890-1918) extended figure drawing into psychological territory through extreme elongation, angular contour, and raw, searching line quality. His figures are physiologically distorted but psychologically intense, demonstrating that conviction and specificity of vision can justify departures from classical proportion that would otherwise look like errors.
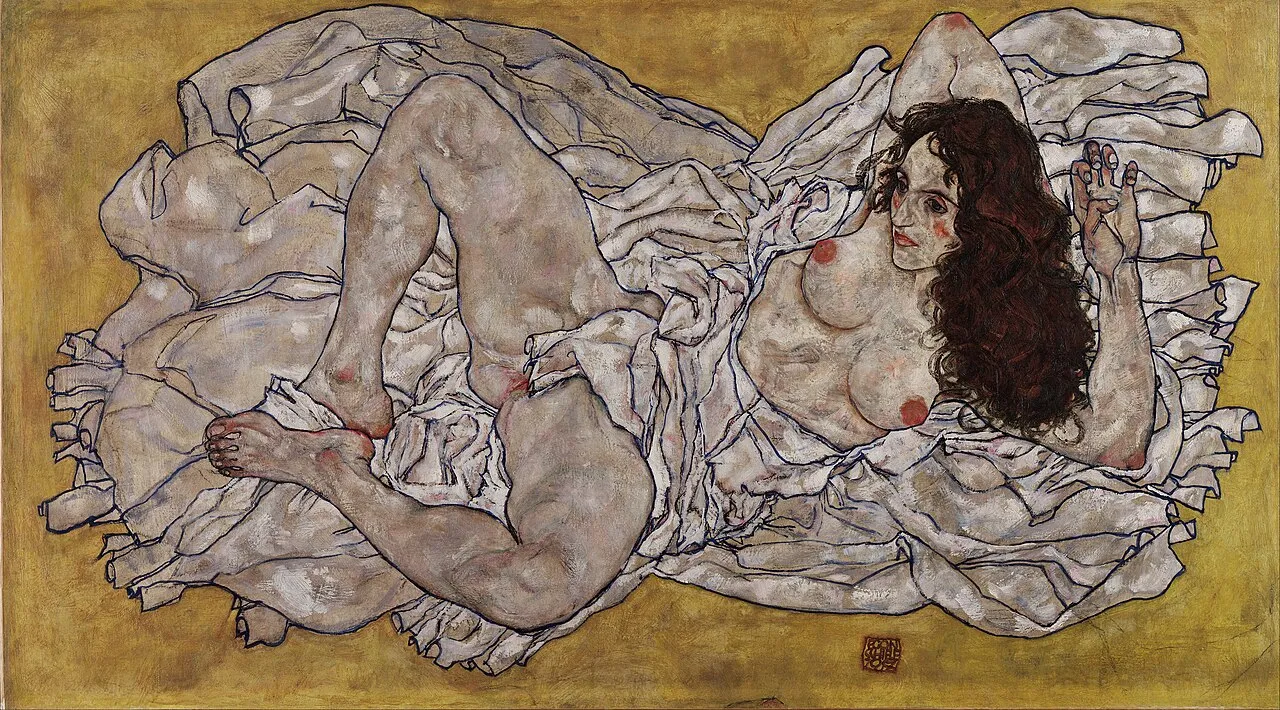
Egon Schiele, "Reclining Woman with Green Stockings" (1917), gouache and graphite on paper, 29.4 x 46.3 cm. Private collection. Schiele's figure drawings use angular distortion, assertive contour, and raw line quality to create psychological intensity. His work demonstrates that proportion can be deliberately distorted when vision and commitment support the choice. Image: Public domain, via Wikimedia Commons
Building a Figure Drawing Practice
Progress in figure drawing requires regularity more than duration. Three half-hour sessions per week of timed gesture drawing will produce more improvement than a single three-hour session once a week, because frequency builds the neurological pathways that make mark-making instinctive.
Find a life drawing class if possible. The experience of drawing a three-dimensional person in space is irreplaceable. Most cities have at least one open life drawing session per week; art school continuing education programs often offer evening classes. The social component, drawing alongside other artists of different levels, provides both motivation and perspective on your own development.
Between sessions, draw from photographs, sculpture, and other drawings to maintain practice. Analyze finished figure paintings you admire by tracing the gesture line, checking proportion measurements, and identifying how the artist has handled specific anatomical challenges. This kind of analytical study accelerates development by making explicit what the experienced artist does intuitively.
Figure drawing skills transfer directly to every other drawing subject and support the compositional decisions discussed in our guide to composition in art. The value discipline developed through charcoal drawing is the ideal complement to the gesture and proportion work of figure drawing.
Final Thoughts
Figure drawing has occupied the center of art education for five centuries for simple reasons: it is the most demanding and most complete drawing problem available, and the skills it develops transfer to every other subject. Gesture, proportion, and anatomy are not separate skills to be learned sequentially; they are simultaneously present in every successful figure drawing, held together by constant reference to what the eye actually sees.
Start with timed gesture drawings. Add structural analysis. Study anatomy gradually, learning each area as you encounter the problems it presents in your drawings. And attend life drawing whenever you can. The human figure, observed carefully and drawn with commitment, is the fastest route to becoming a stronger artist in every other area of your practice.


